
This post contains affiliate links. This just means that if you make a purchase through any of the post links, I may earn a small commission at no extra cost to you. See my full disclosure here.
For this post, please give a warm welcome to my husband! This is his version of the Closet Office Makeover (Wife Version) to give a more detailed explanation of how this project came together.
I will start this “How To” with a disclaimer: we are not professionals. Also, we did a lot of head scratching. You could spend thousands of $’s with buying correct tools and supplies for this closet office makeover, but that just wasn’t happening. I am the save to my wife’s spend.
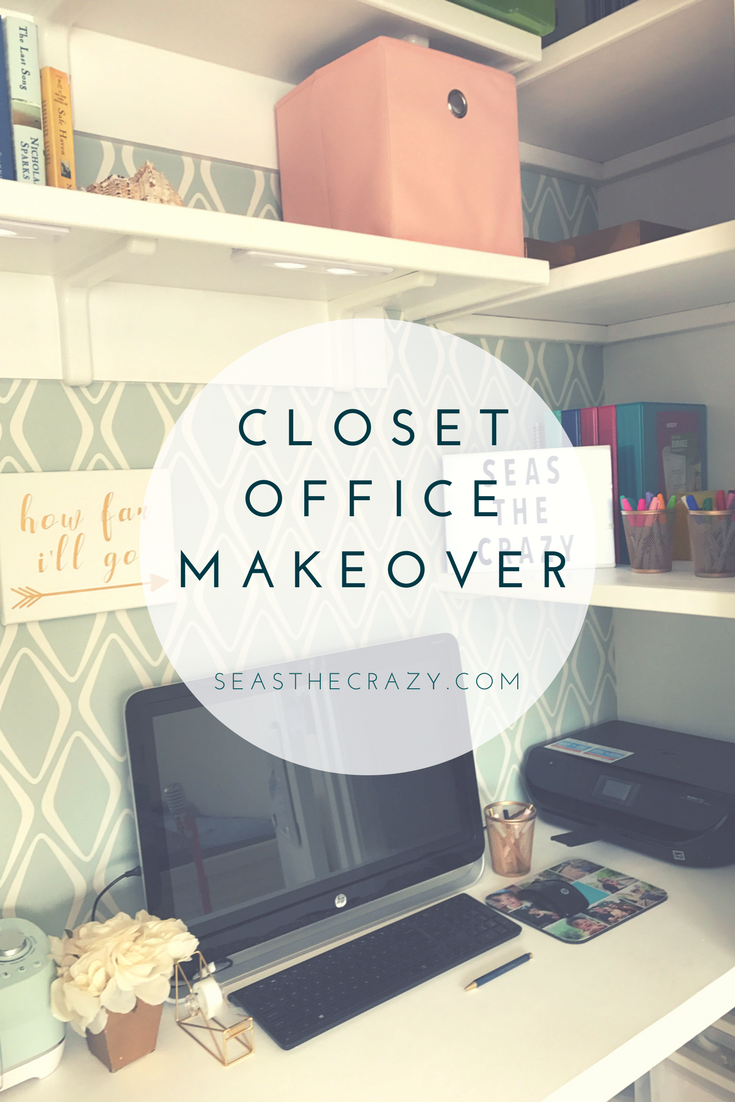
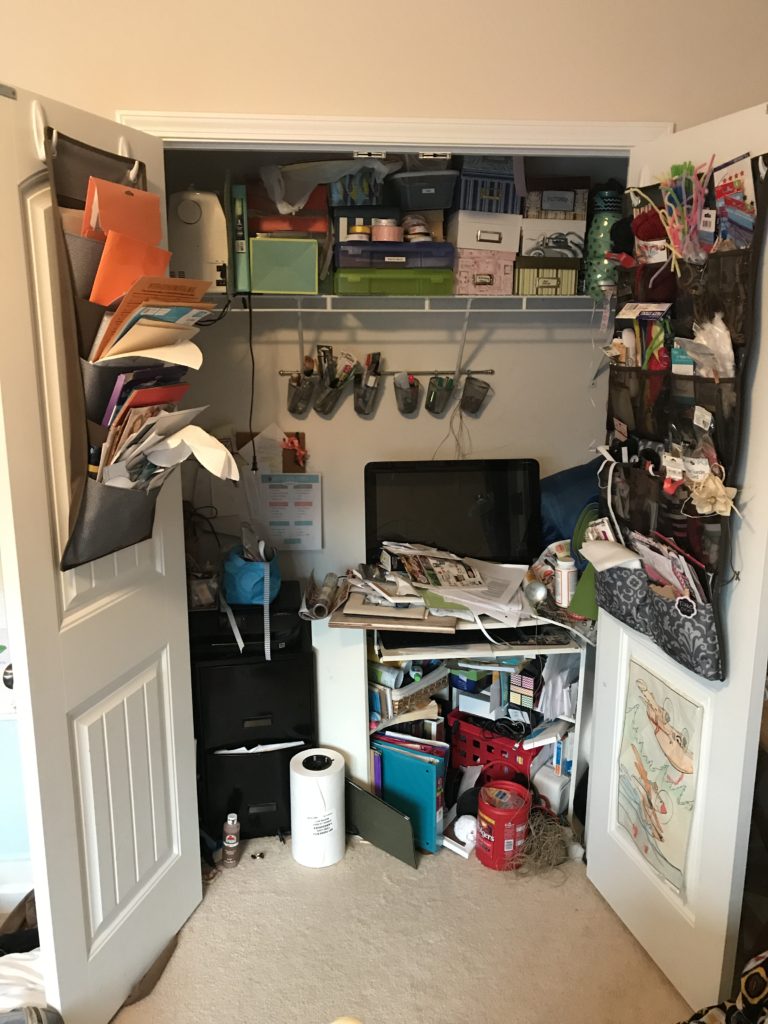
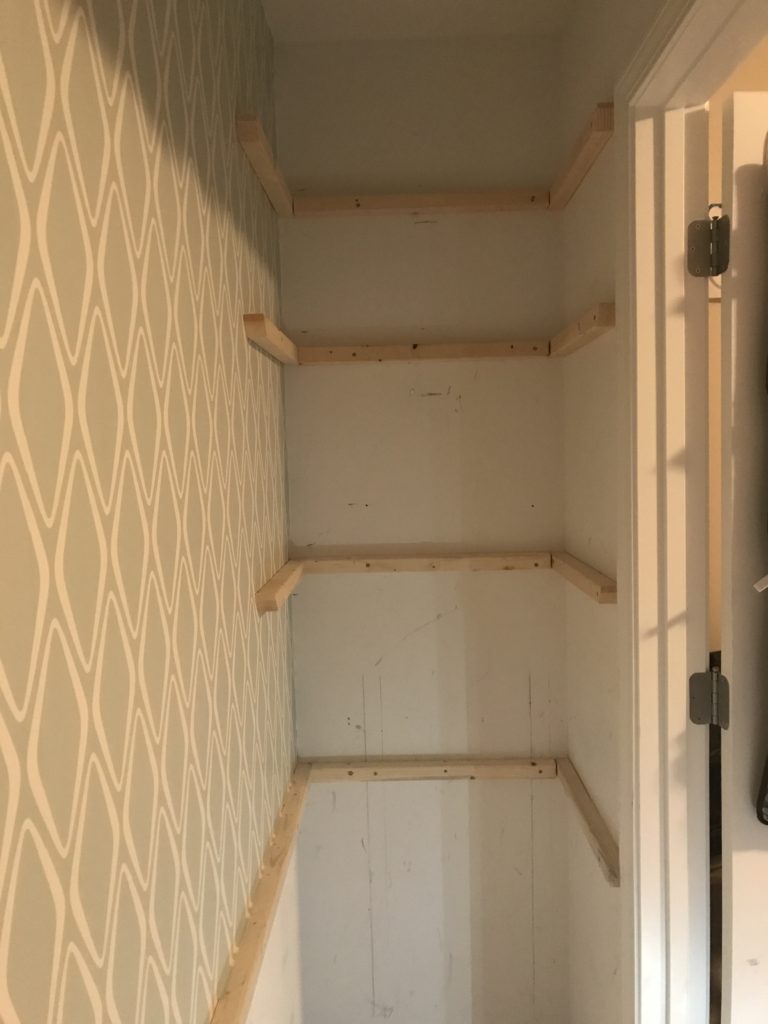
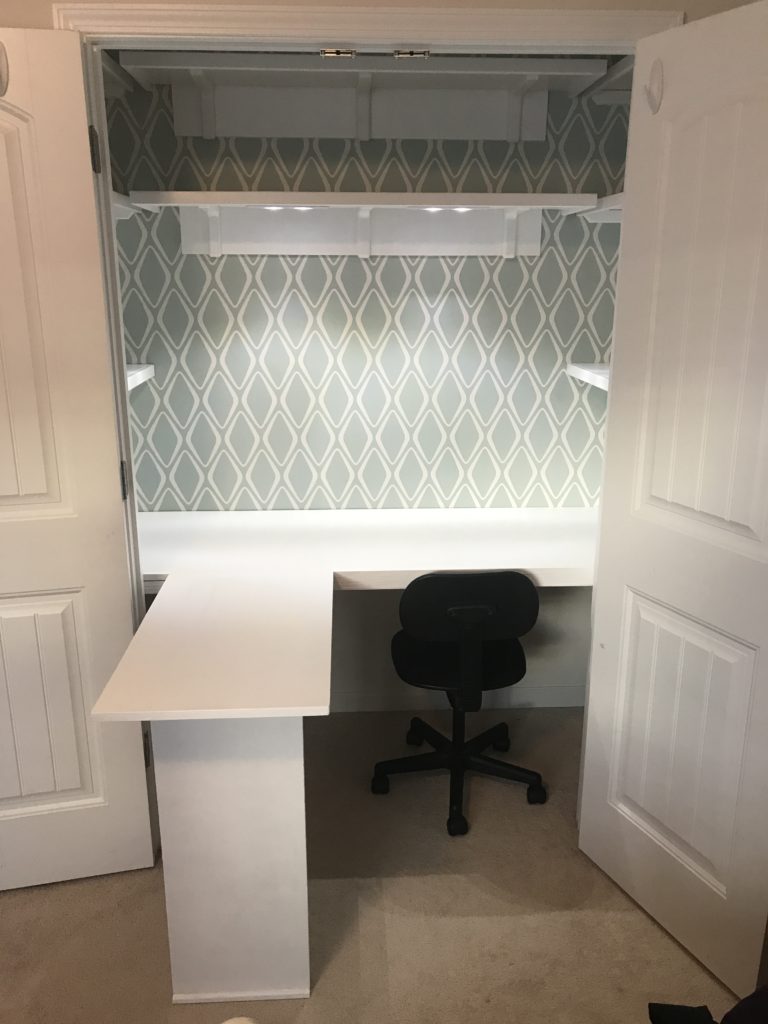
To begin the transformation the closet office, we first needed a plan as to what all was wanted within the small space. This closet was about 8 feet wide, 8 feet high, 25-26 inches deep, and about a 52 inch door opening. I say “about” because walls are never straight and do not ever think things will be square and easy to measure. Considering what we started with, it was only uphill from here:
Decisions: Do we want a solid desk the whole length of the closet? How many shelves? Do we want to add an extension to the desktop? What items HAVE to fit in the space? Once this was figured out, the Father-In-Law went to drawing. We decided that we did want a solid desktop to have the most work space possible, 2 top shelves the length of the closet, and 2 bottom shelves on the sides.
Next was deciding how to do this the most economical way. My Father-In-Law’s favorite thing to poke fun at me for (at least to my face) is my tool selection. On one hand, yes, having the correct tools WOULD make it easier, however, on a budget we needed to figure out how to use most the things we already owned. With drawings completed and knowing basic measurements we came up with what supplies would be needed.
| Supplies | |
| Construction–
(2) ¾ inch sanded plywood (prefer birch for smoothness) (9) 2 inch x 2 inch x 8 foot pine boards (4) 1 inch x 2 inch x 8foot pine boards (2) 1 inch x 6 inch x 8 foot pine boards (1) ¾ inch-2 foot x 4 foot sanded plywood 3 ½ inch construction screws 1 5/8 inch construction screws 2 ½ inch construction screws Shelf brackets Hinge for extension Paint Brushes Paint Rollers Painters Tape Choice of paint-1 gallon semi gloss Caulking Spackling Wood glue Sandpaper-different grades |
Tools-
Power drill and driver set Drill bit set Circular saw Plywood blade for circular saw Compound sliding miter saw Finish nail gun Clamps Stud finder Tape measure Sliding square Level-straightedge (had a 5 foot and 2 foot)
Miscellaneous– Wallpaper/contact paper Lights Surge protector Storage containers |
After contemplating solid boards for construction of the shelves and desktop or not, we ended up choosing to “rip” plywood. It was more cost-effective for us, but would look good either way you would choose. Since I did not have a table saw at home, I had the store cut and “rip” the plywood to rough measurements we needed for a couple shelves and the desktop. They are always sure to tell you that it will not be a perfect cut but it was good enough for me. Be sure to go longer than what you measured. With the walls not being square you may have first measured the smallest part of the wall and now you cut the board too small as well. Measure twice, cut once.
With supplies all at home it was time to start “demolition” and prep the walls.
The one wire closet shelf was removed but left large holes in the drywall. Spackle the holes, let dry, and sand to a smooth finish.
To begin your first pencil marks on the walls, use a stud finder and mark all the studs around the closet.
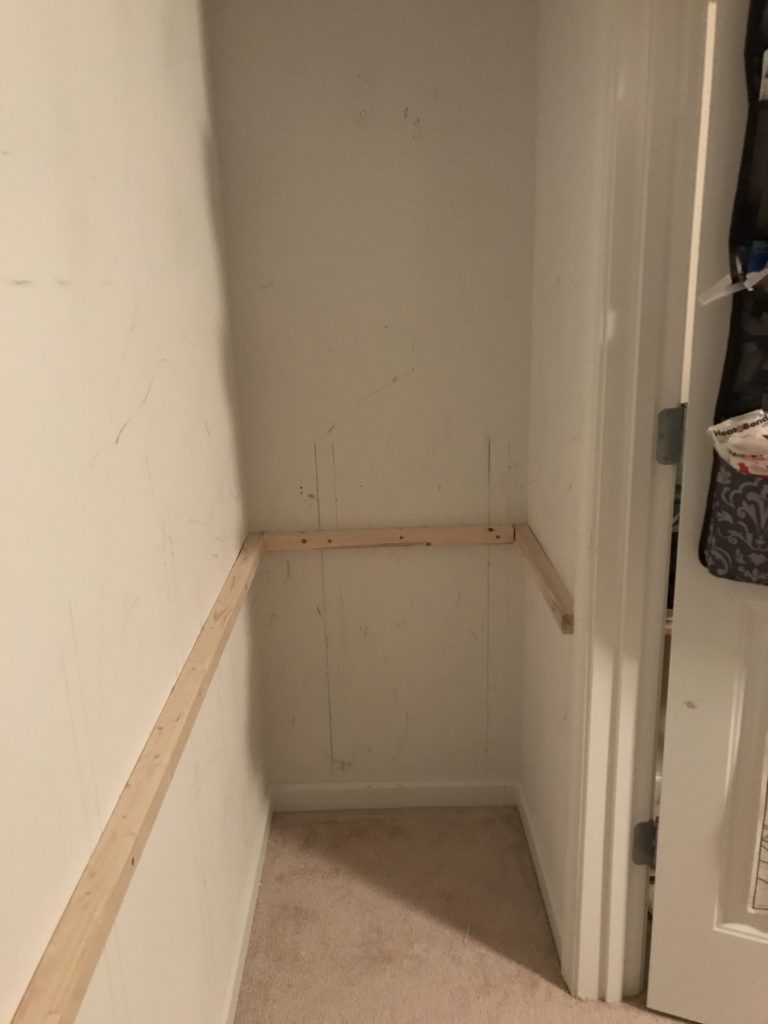
Next, determine the height of the desktop to make a level work space. Based on a desk we had already had the computer on, we went up 30 inches. Make a pencil mark 29 and a 1/4 inches up from the carpet. You are leaving that ¾ inch because this mark will be where the supports go for the desktop and the desktop will add ¾ inch more to give a total of about 30. This does not have to be crazy accurate because you will then be taking the longest level you have and make marks around the whole closet. If you measured from the carpet, or even from the trim, it would be all different because of uneven floors and walls so it is best to just come up to your height once, and then use a level.
We used 2inch x 2 inch pine boards for the support of the desktop. Using 3 ½ inch screws, we made a pilot hole with the drill, and then used the driver to insert the screws. Be sure to hit the studs.
Most would use tape measures to do a lot of the measuring, however, it was easiest to use measuring “sticks” as my Father-In-Law calls them. This takes out any guessing with “bending” the tape measure into corners. By using 2 straight sticks that are shorter than the distance you are measuring, place one end of a stick against one wall, place the second stick on the opposite wall, and where they overlap you would make a pencil mark and have an accurate measurement of that space. This is especially important when measuring the desktop because from one end of the closet to the other was a difference of almost an inch. Had you just cut the plywood square it would have had gaps all around the walls. Once we had the desktop cut, we placed it on the supports that were already placed. We had one tight corner that would not go down so I just sanded it down a little bit and then fit perfectly.
Remove the desktop in order to have easier access to build the rest of the shelving.
Now that we knew where the desktop was going to be, we could then apply the accent wall contact paper. Apply it as per the instructions. This was tedious because it does not slide on the wall like true wallpaper does/ It involved a lot of sticking, pulling off, sticking back on, cussing, pulling back off to match up the design on the paper. The end result was worth it.
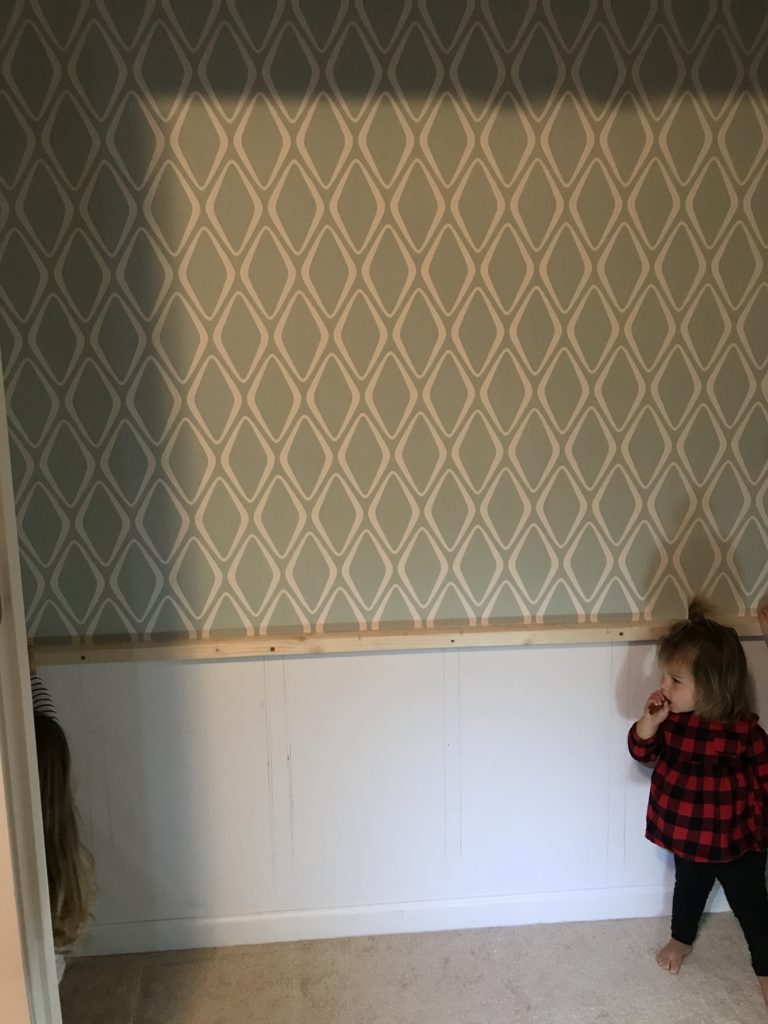
Start measuring up from the desktop to where you want the next shelf. We wanted enough space for the printer to have the lid up for copying but we also went larger to make the distances between the shelves look aesthetically appealing. We didn’t want one huge gap and then short spaces between other shelves. Once we were at a height we liked, we cut a 2inch x 2inch board that length as a measuring stick and marked the walls for the side shelves. We did the same for the top 2 shelves, but with a smaller space between.
Screw in 2 inch x 2 inch boards for the other side shelves. We chose to cut a slight 45-degree angle on the exposed ends to give it a more finished look.
Use measuring sticks to measure the side shelves. Use a circular saw (table saw if you have one) to cut the plywood for the side shelving.
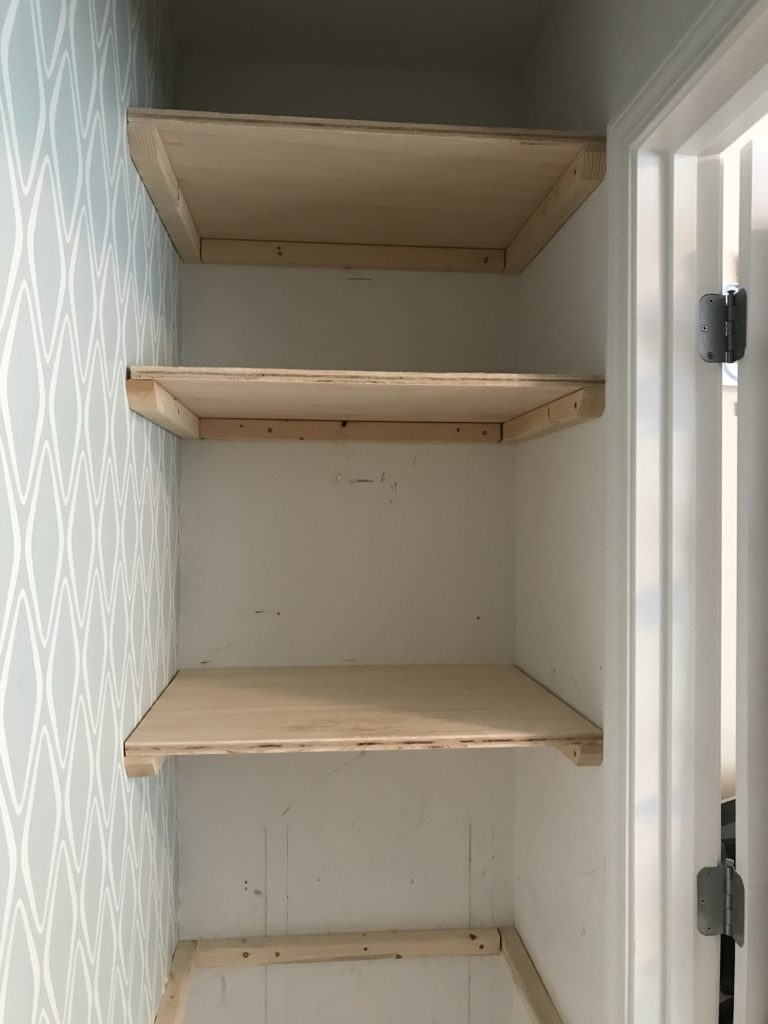
1 inch x 2 inch boards were added to the lip of the exposed part of the shelving for a more finished look. They were placed with wood glue and by using the finish nail gun.
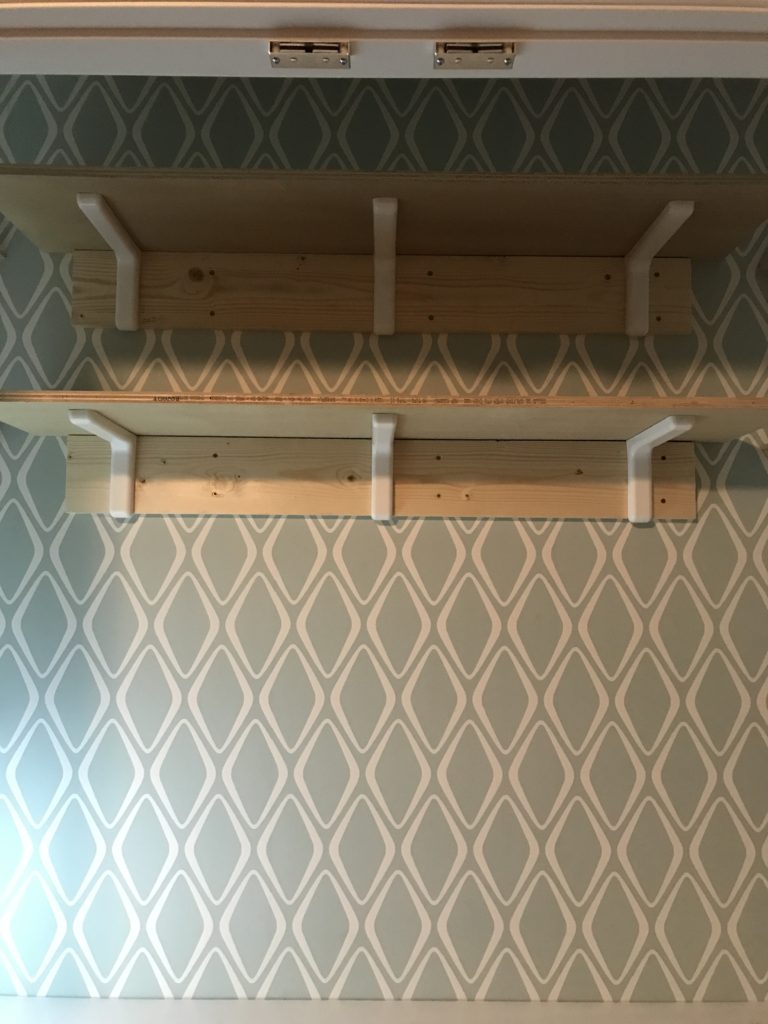
The 2 shelves on the accent wall were pre-cut at the store to 12 inches wide and brackets were bought to hold that width of board. The brackets need to be sure to go into something solid, and since the studs did not match up perfectly we chose to get 1 inch x 6 inch pine boards to anchor to the wall into the studs with 2 ½ inch screws, and then the brackets can go on wherever you want them to look even.
Take out all the shelves and desktop to prep for painting.
Use spackling on all screw holes and use caulking on all exposed edges/corners of your 2 inch x 2 inch supports that will be visible.
Sand everything that will be painted. Start with a medium sandpaper and work towards a fine sandpaper to make as smooth as possible. Be careful not to do much sanding on plywood as it has a tendency to splinter. If it does, use some wood filler or spackling to fill in any chunks that may peel up.
Choose a paint with primer already in it to avoid having to do too many coats. I started with using a brush to get the edges and then rollers for all the flat areas.
After all pieces are dry, place the desktop in first. If you try to do the top shelves first you will not have enough space to get the desktop in the doorway. Place all shelves.
You could use the finish nail gun to keep the side shelves in place, but with the weight that will be on them I let them be so that they can easily come out if needed in the future.
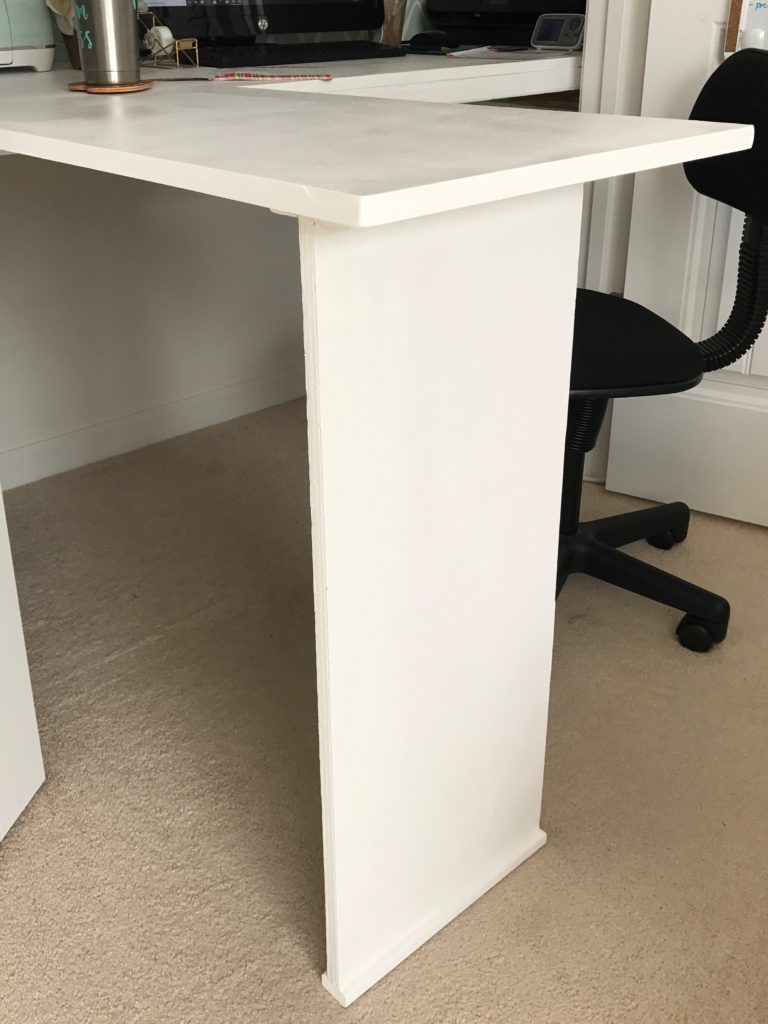
Build the extension. We used the 2 foot x 4 foot piece of plywood for this and cut to measurement. Decide how much room is needed to fit the chair beside the extension and work comfortably to get your width. We also wanted it as long as possible, and since we chose to hinge the extension down, we went with the length from the desktop to the floor. Use the circular saw to make the cuts. It is very important that the edges where the hinges will be are as straight and flush as possible to have a clean desktop.
Attach a hinge on each end. Be sure to have each hinge straight as possible so it goes up and down smoothly.
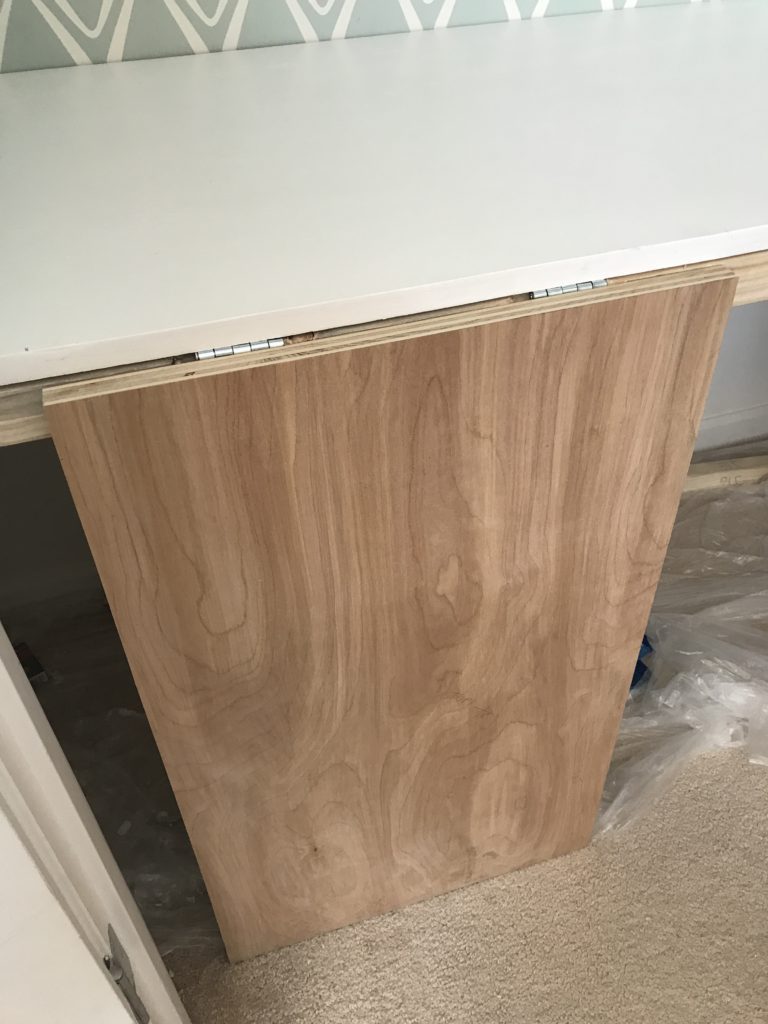
Build the extension “leg” so that it stays up and is sturdy. We debated a long time to make a telescoping leg and attach it to the bottom of the extension, or just a solid piece that will get tucked away when the doors are closed. Trying to figure out how to keep it anchored to the extension, but also store it flush in order to have things stored behind it, was too much of a task. We went with leftover plywood, placed a 1 inch x 2 in board on the end to be smooth on the carpet. Placed 2 pieces of 1 inch x 2 inch boards on the bottom of the extension in order to have a slot where the support would go.
Sand and paint the extension.
Add the lights.
Complete!
With the building supplies needed and accessories, this project came out to around $300. But can you put a price on happiness? Happy wife, happy life.
Now to bring her in to fill it up again. I mean decorate. Read her version of the closet makeover here.